Hey there everyone, I posted a project I was working on a while ago (https://sebiik.github.io/community.axoloti.com.backup/t/retro-lookin-synth-work-in-progress/4134) but I ditched it in favor of a simpler design that makes upgrading easier.....I also totally fucked it up and it was too dang big.
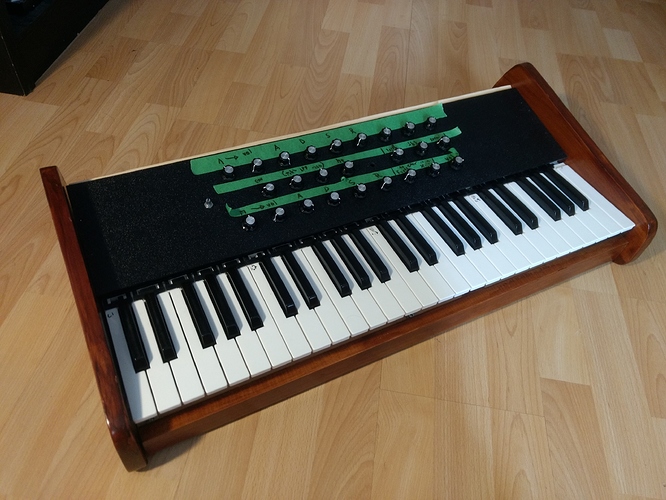
Anyways, Here is my simpler, smaller version .02 retro lookin' synth.
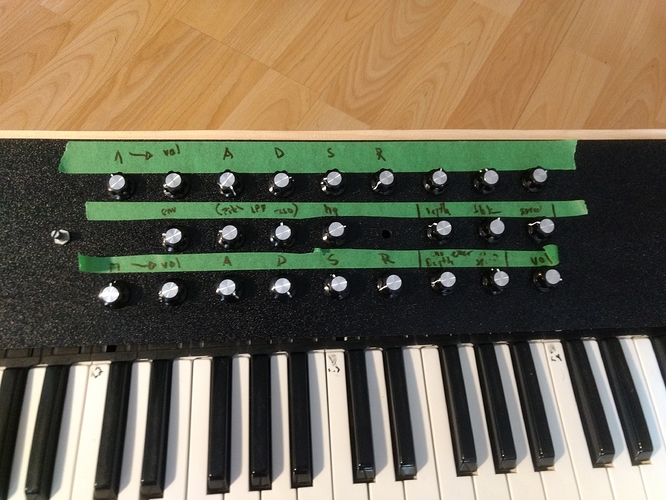
I'm currently using abs plastic sheets for the panels because they're cheap as hell, look awesome, and cant rust. Also Because they're so cheap I've got a bunch of them that I can silkscreen with my own designs and just swap out when I want to change things (like adding buttons or switches...some day!) ..currently green painters tape is doing a good job though.
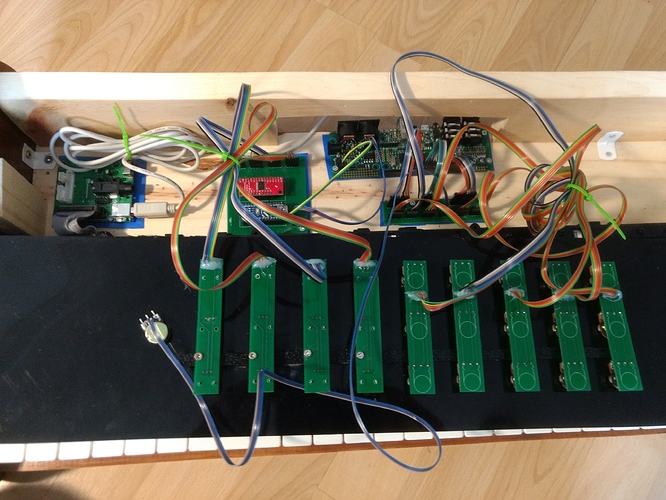
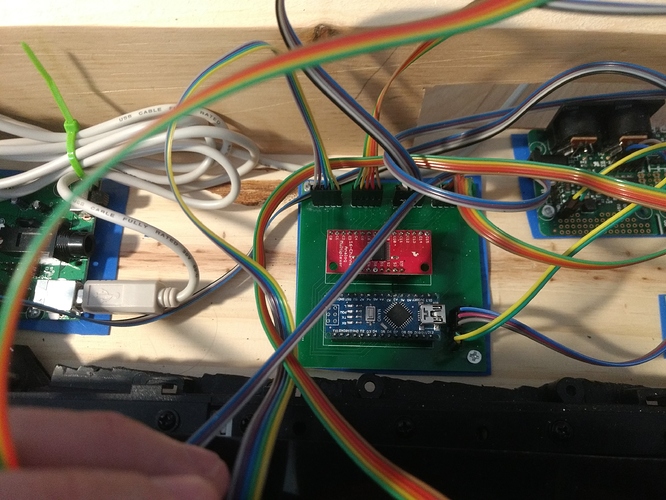
Heres a look at the inside. I made two little motherboard things. The one on the left with the arduino nano and multiplex board is my DIY midi controller I made by following this tutorial https://www.youtube.com/watch?v=ellhUszaMZs
The tutorial doesnt include how to add a multiplex board so I made one! Here is my tutorial https://sebiik.github.io/community.axoloti.com.backup/t/make-a-usb-midi-controller-with-16-to-27-analog-inputs-for-cheap/3866
The little motherboard on the right connects my potentiometers to the axoloti.
Everything connects using ribbon cables of course. I made them myself, hand crimped each and every last wire...it was a lot of work but it was worth it because I'm horrible at soldering and these ribbon cables provide a nice and snugg connection with no noise...There's a shitload of extra slack on each cable though because I was using them on a bigger synth design previously...I'll trim them eventually but for now they work
As for the usb midi controller, Im thinking about de-soldering the usb input from the axoloti board and moving it so that it remains inside of the enclosure (which will eventually be sealed off using another peice of abs plastic) but for now I'm just having fun playing my little synth and am in no rush.


