Believotron Wanderlust Axoloti Controller


#1

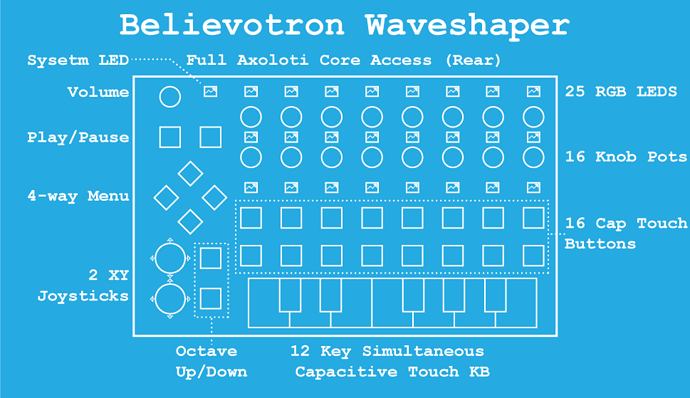
Hello, I would like to introduce the Believotron Waveshaper (believotron.com). My friend Michael Una and I have been making and playing with synthesizers since the 90s. I've been working as an Electrical Engineer in design/mfg/IoT for the past 16 years. Michael has been making strange and wonderful instruments over at Unatronics.com

We wanted to take all of that design experience and offer as much flexibility as possible in a low-cost package. We both fell in love with Axoloti the minute we saw it and promptly threw out our audio engine we'd been working on.

We're currently done with our Rev 1 breakout prototype where we connected the capacitive touch inputs, RGB LEDs, and ADC Multiplexer to allow for so many knobs. I'm about to start working on the Rev 2 board and I wanted to share the project as-is so you could get a chance to see it and let me know what's important for you.

We do plan on creating more exotic instruments, but really wanted to make something special that you could produce, perform, or just sit in your basement and shred your eardrums :smile:

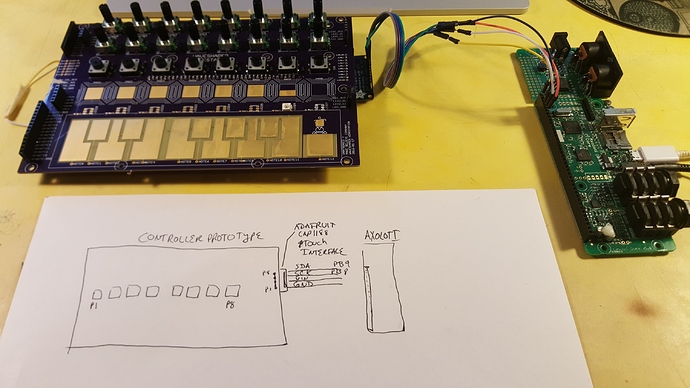
Here's a pic of Rev 1 using the older CAP1188 (We've switched to the MPR121 for a number of reasons).

Let us know what you think!


Anyone planning to make and sell an enclosure?
#2

If you're interested, please sign up for information about the release: http://www.believotron.com/sign-up/


#3

Nice project! I'd like to see some videos if/when your prototype is functional. A seven segment or lcd display would come in handy to scroll through patches with the menu buttons I think. Any estimates on price already? :smiley:


#4

Hey Toon! I'd be happy to post videos as they come. Right now the Rev 1 works with every element separate. Rev 2 is adding all the technologies onto one board and making sure they work together as a system.

There is no price estimate until we verify the system integration (I may have to add an extra microcontroller!).

We're also working on a modular add-on that has a capacitive touchscreen for scrolling / menu buttons.


Running Axoloti on an Audiothingies P6
#5

looks interesting - I think id be very tempted with a housing like this.

it looks like i might be a fun to have something like this that you could play on the couch, but powered by axoloti.
(kind of like organelle)

perhaps a small segmented LED display might work, e.g. so you can see parameter values as they are changed, or when selecting patches/programs/presets.

an 'add-on' might defeat the purpose (for me) if its not enclosed, since Ive already got lots of 'bits' to carry around, another is a drag - the all in one is nice. (I think its why many like the OP1)

power... the one thing that puts me off organelle is its not battery powered, if I'm sitting outside, I dont want to have to be plugged into the mains. I know there are 'power banks' (and I'm going to get one) but you may want to consider this, even if its only to have suggestions. it may improve the overall appeal.

anyway, great project, hope to hear more :smile:


#6

Thanks @thetechnobear. Great fan of your work both here on the Axoloti site and with the eigenharp. That's a great instrument. I never would have heard of if it weren't for you. Now I have to save up my spare change :smile: to get one.

Every controller is intended to be used as either a eurorack module, or packaged together in a single enclosure device.

The LEDs are incredibly compelling indicators. They're full RGB, individually addressable, and can dim/fade. It's not text, but I think there are a lot of intuitive visual elements to program.

I love the battery idea. I've done a lot of circuit design with LiIon/LiPolymer battery charging circuits and I absolutely think it's the way to go. When I was at Burning Man, my Petting Zoo polyphonic sample synth had battery, meaning I was able to go out and interact with people and let them play with the instrument. I found out that my neighbors had a full modular lab in back of their camp, but I didn't even know it existed until the last day, because it wasn't portable. I think there are a lot of new musical/sonic experiences and art machinen that are about to be built because of the lithium battery.

That being said, It's my goal to get down to the most inexpensive controller possible, because when I was 18 and wanted to make music, I was broke. I got to play with my first synth in college after starting a club using student funds. I think 20 is too late to have to wait for something so awesome as synthesizers. I want to be able to offer the most number of people something they can use, and something great for everyone who isn't eating ramen everyday.

Which means we are likely to split features into a basic and advanced model, with the battery power, graphics, text, etc going to the advanced unit. If there is a way to design it so the end user can add on what they need, I'm in favor of that. Also, it's open hardware, and I invite anyone to continue extending and reinventing.


#7

Looks great. How is the capacitive keyboard made? Hand cut from copper?

Love the name too.


#8

This looks really awesome, is it possible that the key pad portion could be mounted on a breakaway portion of pcb in the future with screw holes on the corners, to enable it to be mounted into a console style enclosure? That'd be even more awesome :]


#9

@mongrol, the keyboard is using an older, but very reliable capacitive sensing technology. For the square pads, they are literally just a 1x1 cm pad with a trace running to a Freescale (NXP) MPR121. That converts the signal to a serial message. There are a wide range of cap sensing chips. If you're curious, Adafruit and Sparkfun should have some good kits. Also, Makey Makey is really interesting (You can hook up and control the synth with pieces of fruit!).

The copper is cut out the same way traces are, etched using chemicals, drilled out with a cnc, or sent to a PCB fab house. The final is the preferred way, because I remove the soldermask-mask. This covers the pad with the same color as the rest of the PCB, and prevents the copper from corroding (and it will, very very fast!).


#10

@debterminer, Thank you!

I'm making all of the controls modular in the PCB software. That way, if you want to reuse just a section of board, you can grab it and put it in a PCB design.


#11

@DazzlingDuke, this is amazing! Precisely what I've been thinking of making (albeit mine would be a MIDI controller)! Big kudos!

If it's not much of a dealbreaker financially, definitely do! The more work is offloaded from the Axoloti, the more power is available for DSP, plus it would mean more flexibility for adding more features, e.g. an LCD.

Keep up the amazing work! I'll be looking forward to the release!


#12

looking good.. any ETA?


#13

Hi @wishniak! We're still in alpha right now. After we get a beta out there, we'll have a better idea of when things are available. You're welcome to be in on the beta. I'll make a post here on the forums, but if you want to sign up to the newsletter, you can be the first to know about the beta: http://believotron.com/sign-up.


#14

Status Update:

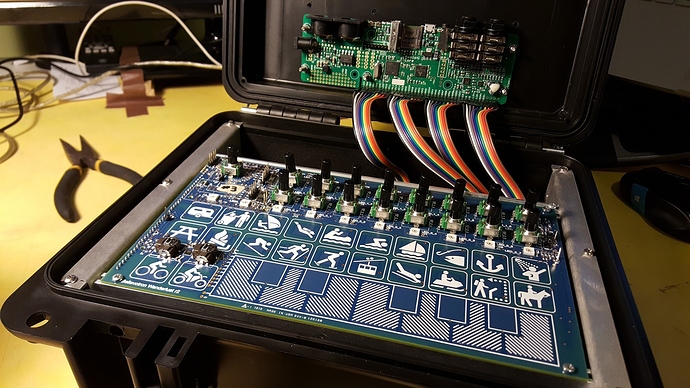
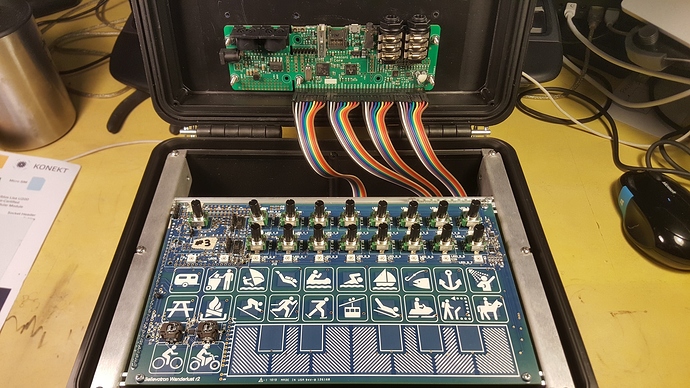
We wound up getting the alpha PCBs five days before our booth at Maker Faire: https://sebiik.github.io/community.axoloti.com.backup/t/san-francisco-may-20-21-22-2016-maker-faire/1365). It was a tough scramble, but there were no errors on the boards (Aside from a short from a screw to chassis :/.

Everything works, we're just hacking away on the software end to get a more immediate and understandable interface.

We've changed the name to Wanderlust and gave it a less traditional set of icons. We wanted it to be less techy and more playful. I liked going on roadtrips when I was a child, because I really had no idea what was around any given corner, and that's sort of what it's like when you're noodling around on a synth.

The response time on all of the capacitive pads (I call 'em pad-caps) is great, thanks to the hardware. I think only a drummer would be able to tell any latency. The multi-touch is going to be the really shining, especially since you can assign every key on the keyboard to a separate or multi-control oscillator chain.

We're sending out the first alpha hardware next week and will be sending out the alphas one at a time to incorporate any improvements we need.

We haven't finished pricing / schedules yet, but if you sign up, you'll be the first to know. Our crowdfund will be early September. Obviously early-bird and axoloti community member discounts.

I can't see the forest for the trees anymore, so feel free to ask any questions about the direction the hardware is going.


#15

It's hard to tell from the photo, but there are RGB LEDs above each of the knobs.


#16


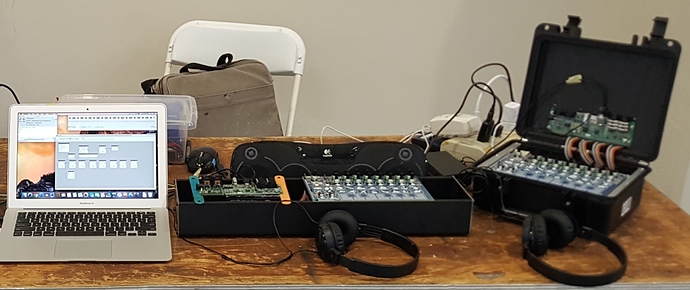
Axoloti's from the Maker Faire SF booth.

As you can see, I had to make a last-minute mount in under 5 minutes for the axoloti. The popsicle sticks brought much joy and amusement to the attendees. They were also pretty struck by the Axoloti hardware and Patcher.


#17

Cool, looks like you making good progress... and I like the playful approach.

are you also designing an enclosure, or going for a bare board approach?
do the pads produce 'pressure', i.e. more surface area of your finger = more pressure.
I like my devices to have some kind of expression (even if its just velocity), something that is often missing in these 'mini devices'

anyway, signed up (probably already did last time, but definitely don't want to miss the news, want to be in asap :slight_smile: )


#18

We're definitely working on several form factors. Eurorack, cut acrylic, formed metal. No injection molded cases though, except maybe the off the shelf clamshell on the right. :). I want people to be able to buy / build the level of case to fit their budget, but ultimately, I'll be most proud of the final formed metal case. Rugged and simple is the goal.

The controller has two xy joysticks for expression. I think the knobs are best used for envelopes and parameter sequencers, so that can work with building dynamic expression (although tied to a step sequencer). The pads themselves are only on-off. We have a design for next year that gives you more expressive control with capacitive touch pads by creating an array of tiny contacts, but for now we're sticking with this design.

It was actually really easy to make progress. The Axoloti is really easy and swift platform to develop on. Making the controller was the easy part :wink:.


#19

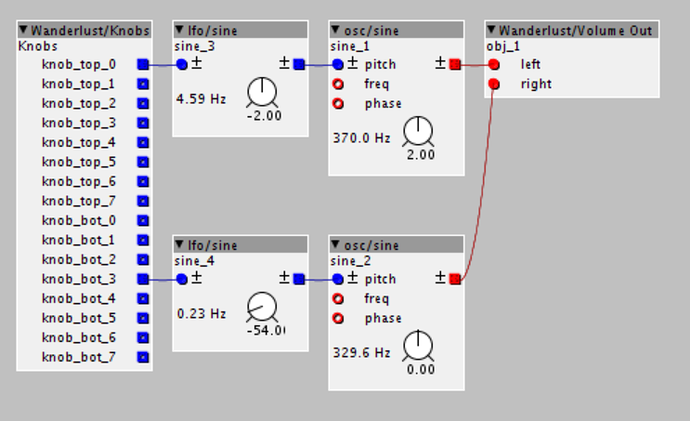
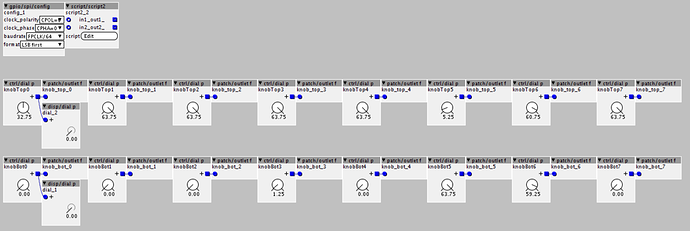
I've started hacking together objects for people to build with the Wanderlust controller.

Up until now, I've just been patching into the sub-sections that I need to, but now we're trying to understand the controller from the point of view of someone using the tool. We hope that it's easy to understand. It's certainly very easy to connect up and use them in other patches.

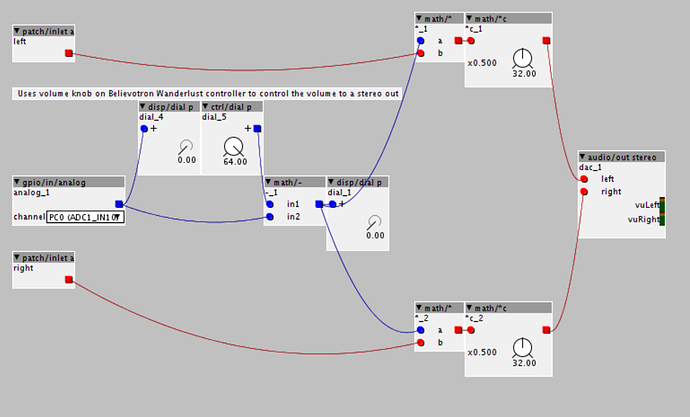
Here is the insides of the volume object:

I'm not sure how to make this prettier, but this is the volume object. I kept on almost ditching the volume knob, but I'm super glad I kept it in. I've saved my eardrums :).

I'd be curious if there are different / better ways of doing things. I've been looking at as many other patches as possible, but it could very well be I'm missing some important perspective or context. Anyways, it's super easy to develop on the platform.

As always, the code is here: https://github.com/Believotron/Axoloti-Patches


#20

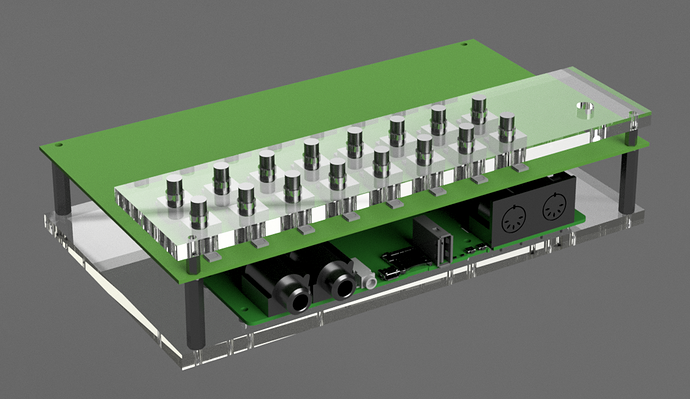
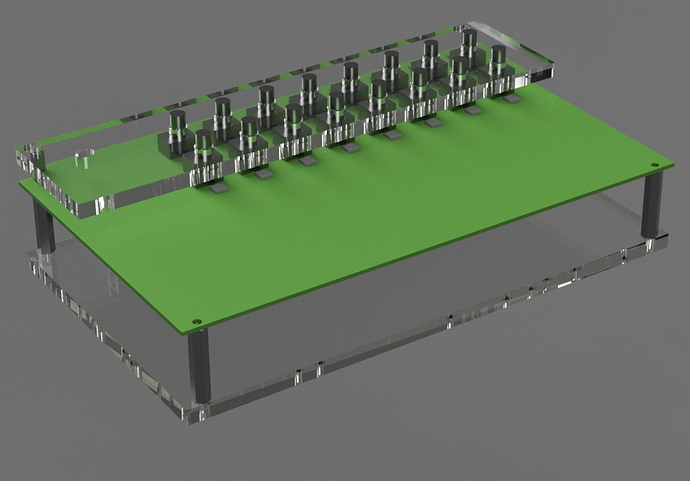
I just finished the DIY Acrylic enclosure for connecting a Wanderlust controller with the axoloti. I'm more interested in the metal case, but I wanted to model everything to make sure I didn't forget something / interfere with another part. Suggestions / modifications are always welcome. We're still in the alpha stage and looking for bugs.

I'll be uploading everything to GrabCAD, Fusion 360, and hosting the step files on github. I'm working on some scripts so this won't be manual. Let me know if you want any models right now and I'll speed that up. Once we're in beta, I'd like to have everything checked-in in real-time. (I've posted the Axoloti core here: https://github.com/Believotron/3D-Models)