Axoloti Travel Synth (now with sound + enclosure)


#1

I recently inquired about travel synths on the Muffwiggler forums, which turned out to be a thread filled with awesome recommendations. One of them was a nicely made, but at 800€ also quite expensive, Axoloti based synth. I wasn't in a big DIY mood before, but when I read about that synth I thought to myself that I really should come up with an Axoloti project myself, fitting my specific travel synth needs, outlined in the thread (no screen, ambient/noise, no elaborate setup required, simple, small, USB or 9V power).

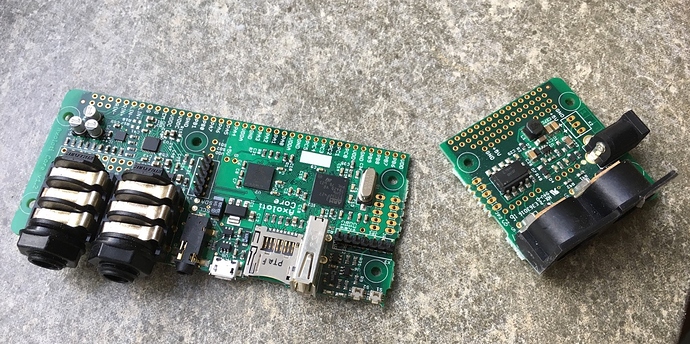
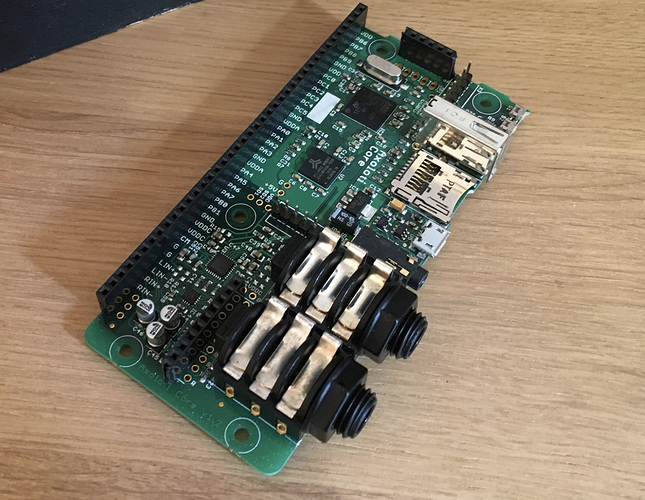
So, last Sunday, I took my "Conduttrice" Axoloti project apart, which was collecting dust in a drawer for a while now. Inside, it had an Axoloti with its MIDI PCB broken off, which would be a great base for a small, self-contained travel noise maker:

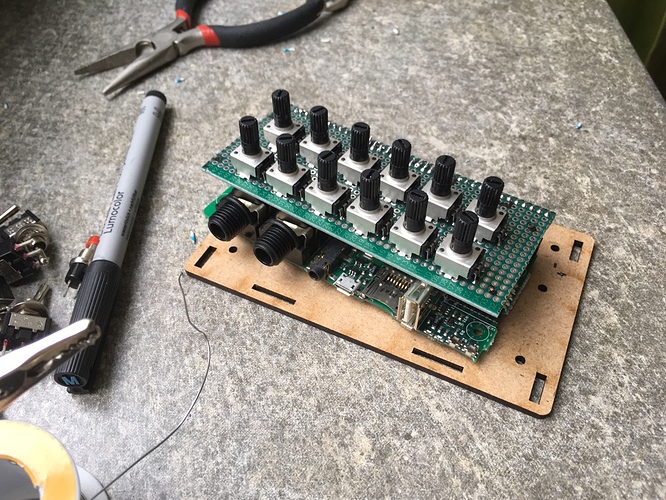
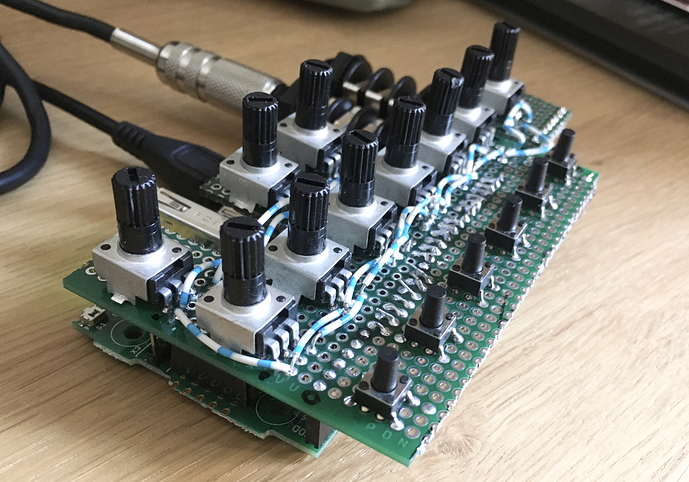
I quickly soldered a shield with some knobs and buttons ...

... and started building a patch. Or rather, several patches which could be switched using the tiny buttons on the back of the Axoloti PCB, next to the LEDs. It was a ton of fun, coming up with small synth ideas around those ten potentiometers and six momentary push buttons.

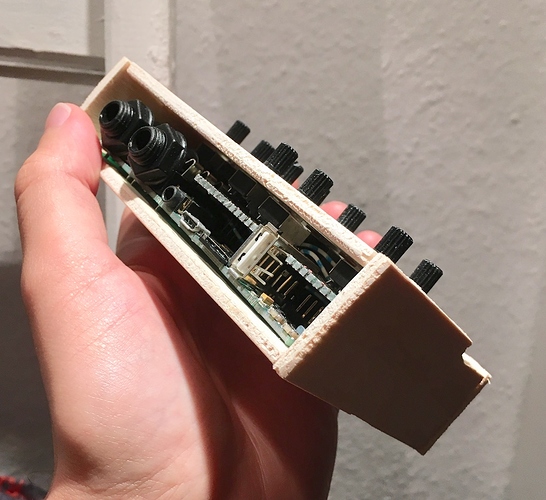
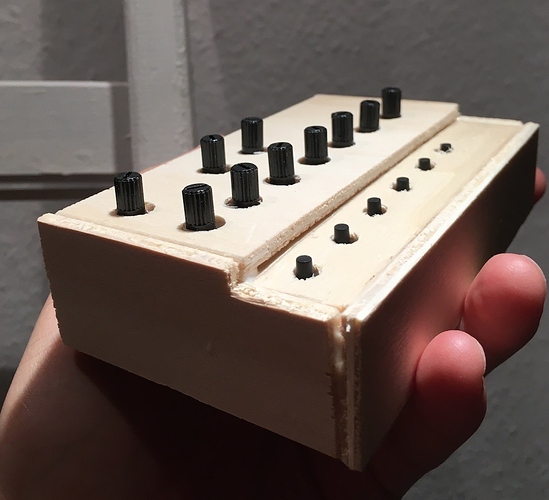
Today then, I built a small wooden enclosure for it:


It's not great :sweat_smile: So I dug out the vector files for my old "Treppenlift" Axoloti project, which was a sequencer and audio effect for the Bastl Instruments MicroGranny2. I modified the enclosure files to fit the Axoloti without the MIDI ports and also got rid of all the knob and button holes in the design. A first order of the enclosure was sent to my laser cutter of choice and now I'm waiting for the price and then most probably also for the shipment. I exchanged the acrylic top panel for wood, so that I can drill the holes for the knobs and buttons in there myself, while I'm figuring out how to properly build those parts. The shield I made earlier for prototyping probably won't last long I suppose and I don't like those buttons.

Anyway, I'll keep this thread updated and once I reach some final designs, I will also share the documents in case anybody is interested in the housing vectors for example.

#2

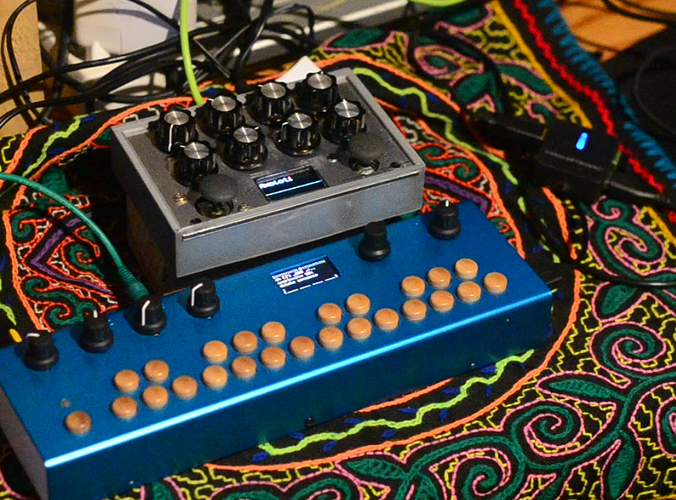
I made my portable axoloti synth with 8 knobs, 2 analog joysticks and an oled display.
I didn't add keyboard because I mostly play it using a small controller (k-board or organelle ) but I would love to make a 100% standalone axoloti synth with touch plates. someday.. The joysticks are a fun thing to add :slight_smile:


#3

That looks very well done! Did you break off the DIN MIDI ports too?

I don't plan to use a keyboard at all for my project. Just knobs and buttons to shape drones, plonks, clicks and maybe control some granular sampling and sequencing.


#4

I almost always break off the Din ports.. :slight_smile: And also I like to replace big jacks for minijacks (there are footprints for minijacks! )
In this board of the picture the black thingies are PSP mini joysticks. (I do love joysticks..) Also, the oled display became essential for me as I switch patches from Sdcard and I like to see which one I'm booting.


#5

That's a beautiful sound. All Axoloti?


#6

Mostly, I think at the end I added a bit of analog fuzz.


#7

Really nice builds here!

I really need to make some nice (standalone) synth/effect box with my second Axoloti that has been collecting dust for far too long.

My main Axoloti I mostly use with the same patch that I've had in there for a couple years already. Paired with an Akai MPK-mini v1, which for me fits the purpose perfectly (keys, pads and knobs).

But a self-containted synth/device based on the Axoloti would be even nicer, no other device to rely on.

However I would keep the midi-DIN sockets since I mostly have a hardware based studio/setup and I have a lot of devices I want to be able to plug together.

@NightMachines do you have any audio examples of your project?


#8

I will actually go camping this weekend and take my prototype into the field for some testing. I also have a Reloop Tape 2, which I bought to quickly and easily record WAV audio on the go. So my plan is to record several tracks of me noodling with the Axoloti and then to edit those into a music piece (probably in Cubasis on the iPad).

EDIT: In other news, I got the cost estimate for my laser cut housing and it was alright at around 30€. I’ll receive two of them next week I think and might sell one of them, if I don’t break anything and if my measurements were correct :wink:

EDIT2: @dreamer did you fit the Axoloti inside of the MPK-mini?


#9

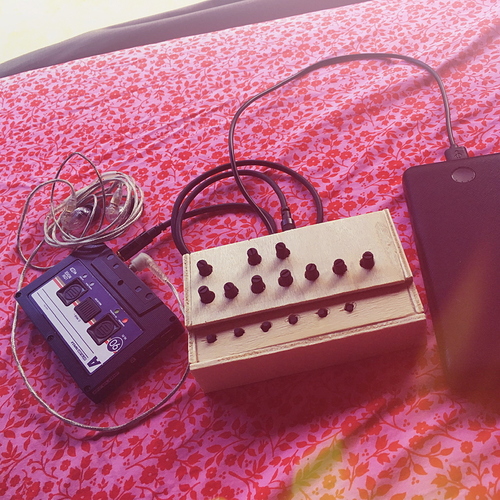
Travel setup test in my camping tent successful! Headphones, Reloop Tape 2 recorder, USB powerbank and my Axoloti prototype.

Recorded some stems and will edit a track together after the weekend :slight_smile:


#10

Alright, here’s a first ambient noise track, in stereo:

I played and recorded five of my current prototype’s Axoloti patches and then edited the stems together into this track with Cubasis 2 on the iPad, adding only volume adjustments and a subtle master EQ and compressor.

This is basically how I wanted to use this travel synth and it really does seem to have worked out nicely. There probably won’t be any meaningful labels on the device, so all patches should use the knobs and buttons in a way that offers intuitive, experimental audio exploration possibilities. As I wrote in the Muffwiggler thread mentioned in the OP, I want to operate and record it while I’m tired, in bed, in a tent or on a train. In fact, the above recordings were done in the dark in my tent at night, after a nice bottle of red wine (we were camping with a fun group :yum:).


#11

Received my prototype enclosures. Looks like my measurements were good :sweat_smile:

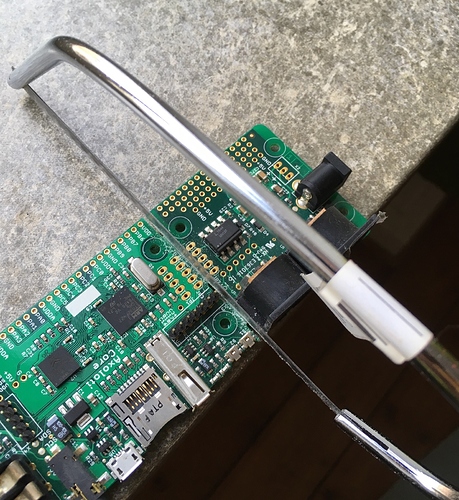
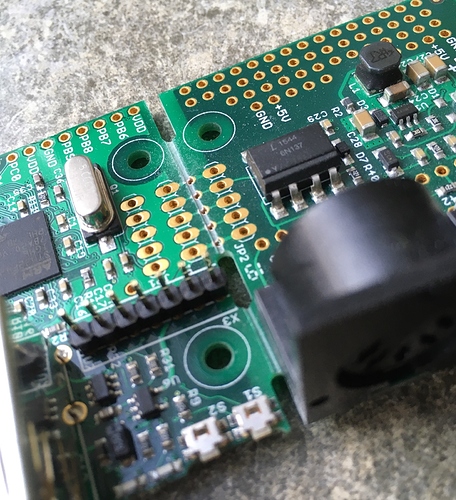
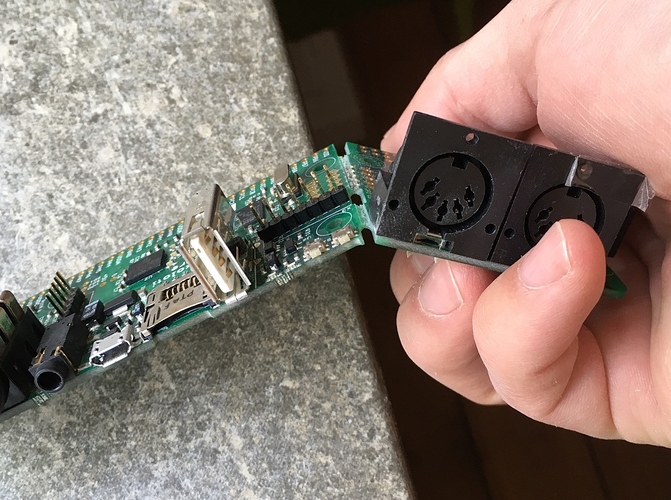
Here's a quick image tutorial on how to properly remove the DIN MIDI ports:

Saw a groove across the board at the PCB's break point:


Snap the board off, over a hard edge:


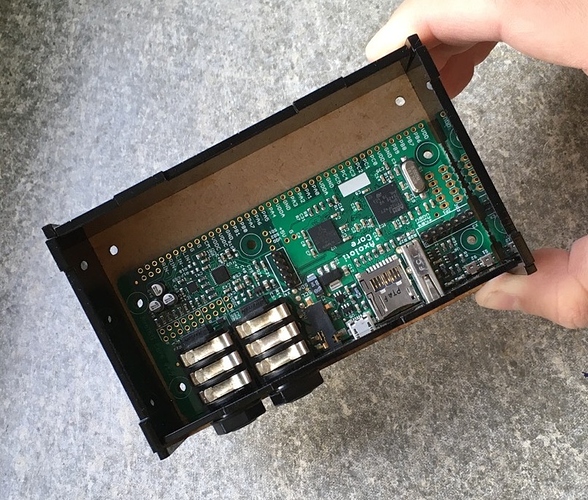
It fits!

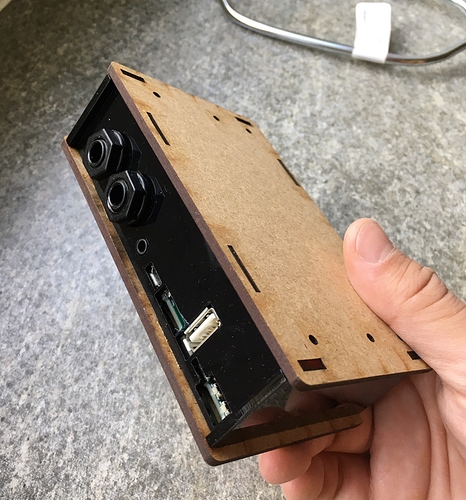
Closed:

As I wrote earlier, the top and bottom are made out of wood, so that I can now easily drill holes in them for potentiometers, etc.

Once I'm set on the final design, I might draw a new top and have that fully laser-cut. I also want to do some more tweaking of the back panel. The holes all fit nicely, but the little PCB buttons can't be pressed as easily as I'd like to. In the enclosures thread I saw some people just added simple long cutouts over the buttons, so that one presses the acrylic onto the buttons. Should have looked at that thread earlier :stuck_out_tongue_winking_eye:


Anyone planning to make and sell an enclosure?
#12

The new enclosure is almost exactly the same size as my prototype, by the way. I just added two or three millimeters of height to it, in order to fit pots and switches more flexibility above all the Axoloti connectors.


#13

:dollar::dollar::dollar::dollar::dollar::dollar::dollar::dollar::dollar:
Since I didn’t need to modify the enclosures and thus didn’t break anything either, I’ve got one enclosure for sale inside Germany or the EU. See here:
-> https://sebiik.github.io/community.axoloti.com.backup/t/anyone-planning-to-make-and-sell-an-enclosure/140/493
:dollar::dollar::dollar::dollar::dollar::dollar::dollar::dollar::dollar:


#14

Alright! Had some DIY time today and built my Travel Synth v2 into the laser-cut enclosure.

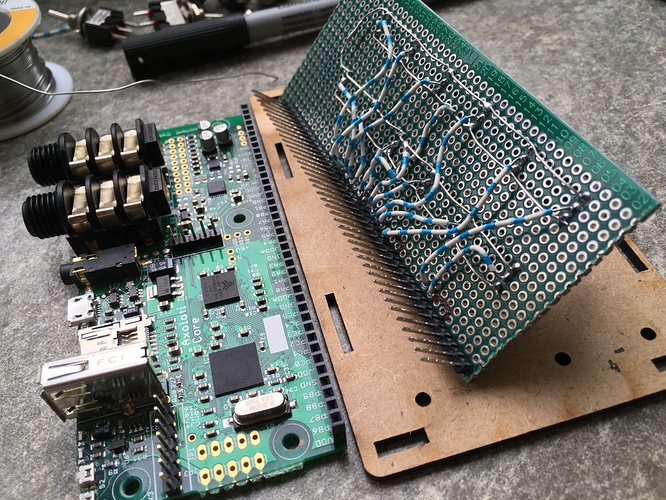
Soldering a pin header to the Axoloti Core and building a "shield" on a piece of perfboard:

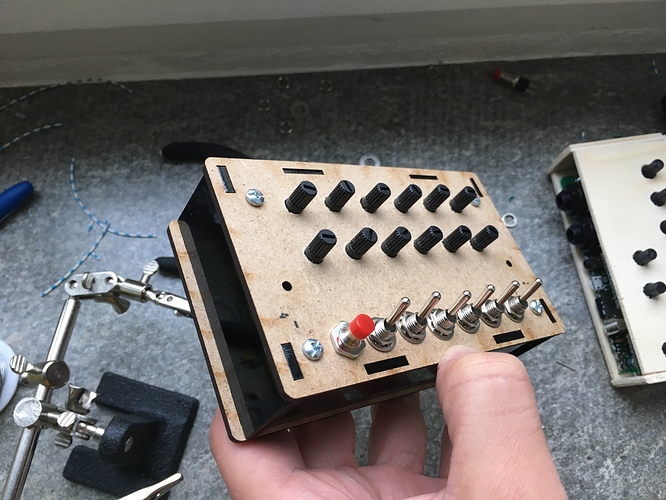
I added 12 potentiometers, using all of the available analog inputs on the Axoloti:

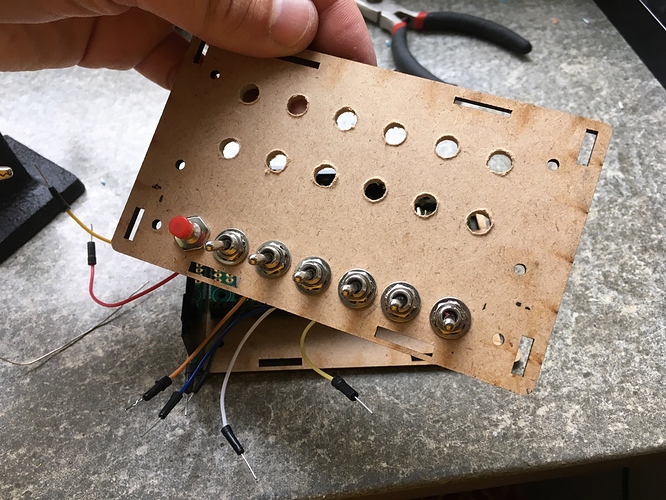
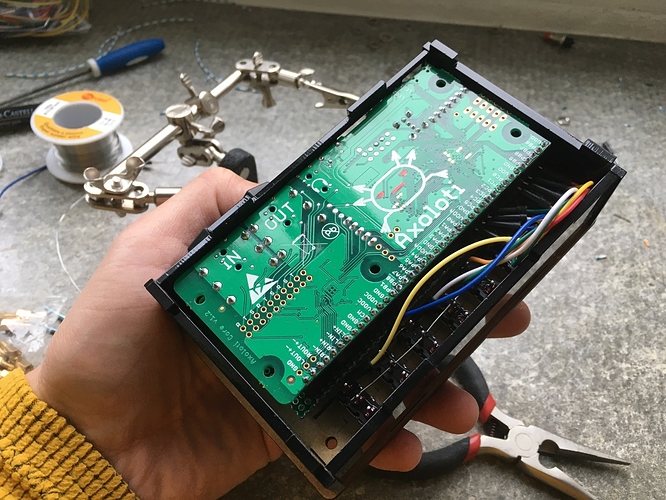
Instead of the flimsy PCB-mount push buttons from the prototype, I chose six toggle switches this time and used the leftover space for a nice red momentary push button. I used the lazy way of soldering jumper cables to the switches, which I could simply stick into the appropriate pin header ports on the Axoloti then:

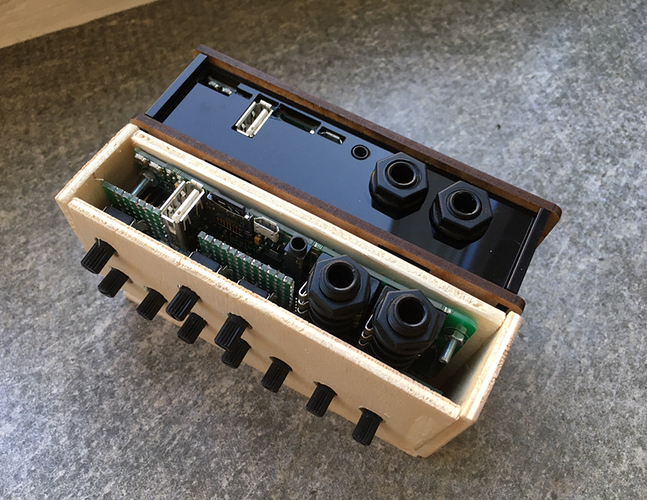
Everything fits nicely, without having to cram stuff together too much:

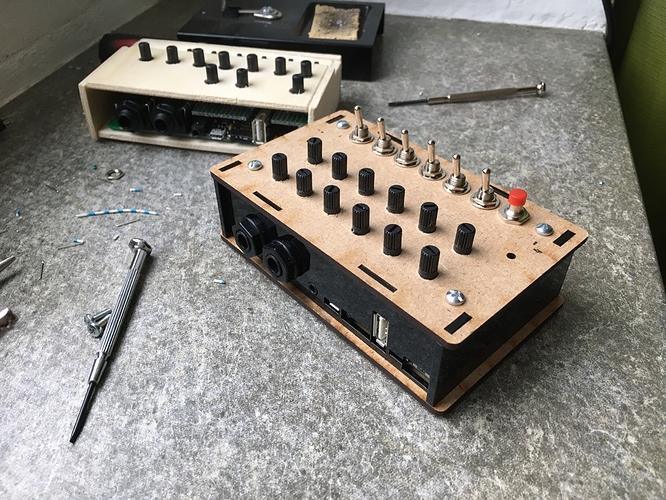
Finished!

12 pots, 6 toggle switches and 1 momentary push button! There is one digital port left on the Axoloti Core, but I didn't feel like adding something to that one and making the inside of the enclosure more crowded.

Okay, now I can continue with patching! First, I'll adapt my prototype patches to use the new additional controls and then my plan is to create at least 15 patches to load onto the mSD card. After that, I will release everything and also make some music :grinning:


#15

Love it! I would add lipo battery and display though (even the super tiny one)


#16

Thanks! I want to build an Axoloti with a display too at some point, but this one was specifically made not to have a display and also not to have knob/button labels. It should work intuitively for sound exploration and experimentation.

Regarding the battery, I always carry one or more USB power banks with me, which I find more convenient than LiPo battery packs.


#17

In most patches I actually don't use the oled.. but anyway, it's a great addition when switching patches from sd. I also don't label knobs as they change function constantly..
for "tabletop" axolotis I also use Usb power banks but in my experience, (or it's maybe just my axolotis) when holding them in the hands, there is high chance of the microusb disconnecting for a milisecond which many times leads into a crash..


#18

Good point about the flimsy micro USB port. Can you recommend a LiPo battery? I assume it would be a 5V one? I’ve never handled those things before.


#19

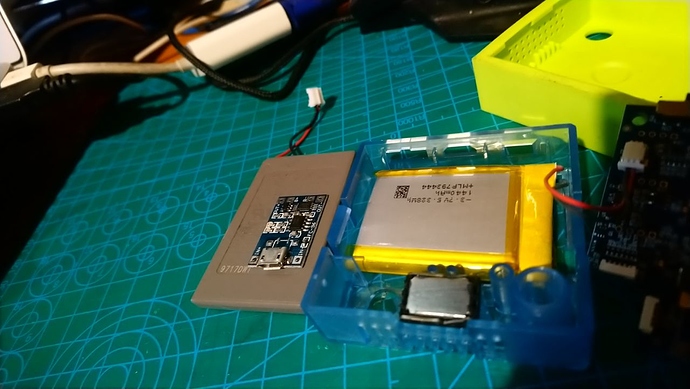
typical lipo's are 3.7v. they can also be "rescued" from many modern gadgets. mobile phones, bluetooth speakers, solar crappy chargers, etc. then you can get a super cheap lipo charger / manager so you can charge with 5 volts and get also 5v out of the lipo. Be extremely careful though. if you accidentally short the battery terminals they make holy smoke and sparks.. (and they die..)
The lipo in the left under the charger is from a bluetooth joystick.


#20

Wow Looks Great! I first thought the saw is a joke, but it is actually possible to cut out the Midi Part if not needed?? Thats amazing :smiley: :smiley: